 MINECRAFT HOSTING
 GAME SERVERS
 Game Panel
You order a server inside the panel, in the same place you will manage it. The whole order takes a few minutes: pick a game, pick a plan, choose any extras, review, pay. Your server begins setting up as soon as the payment is confirmed.
Before you start, create your account and sign in and make sure your email address is confirmed.
Order in six steps
- Open panel.playnhost.com and click Add a server on the My servers page.
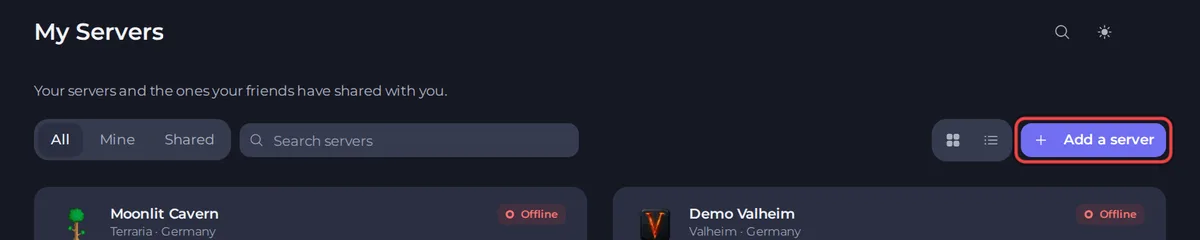
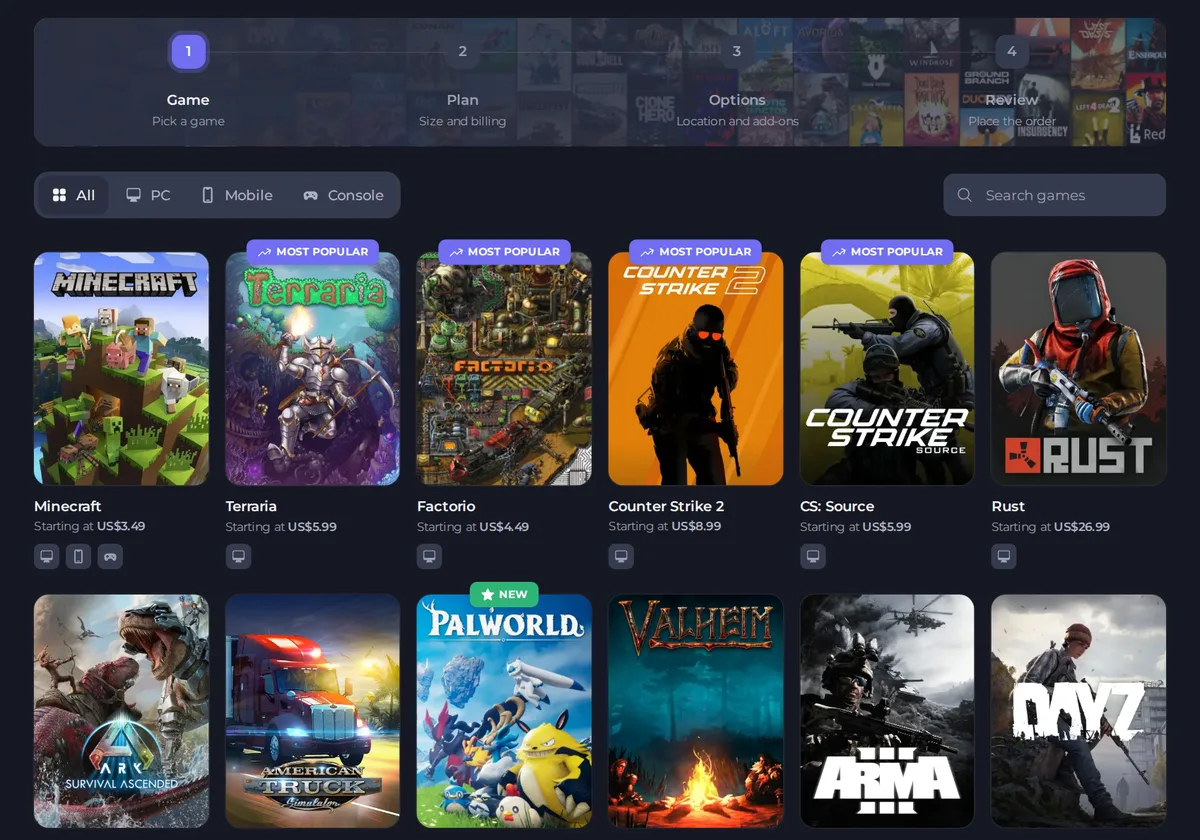
- Pick a game. Use the All, PC, Mobile and Console filters to narrow the list. Each card shows the lowest monthly price for that game. Click the game you want.
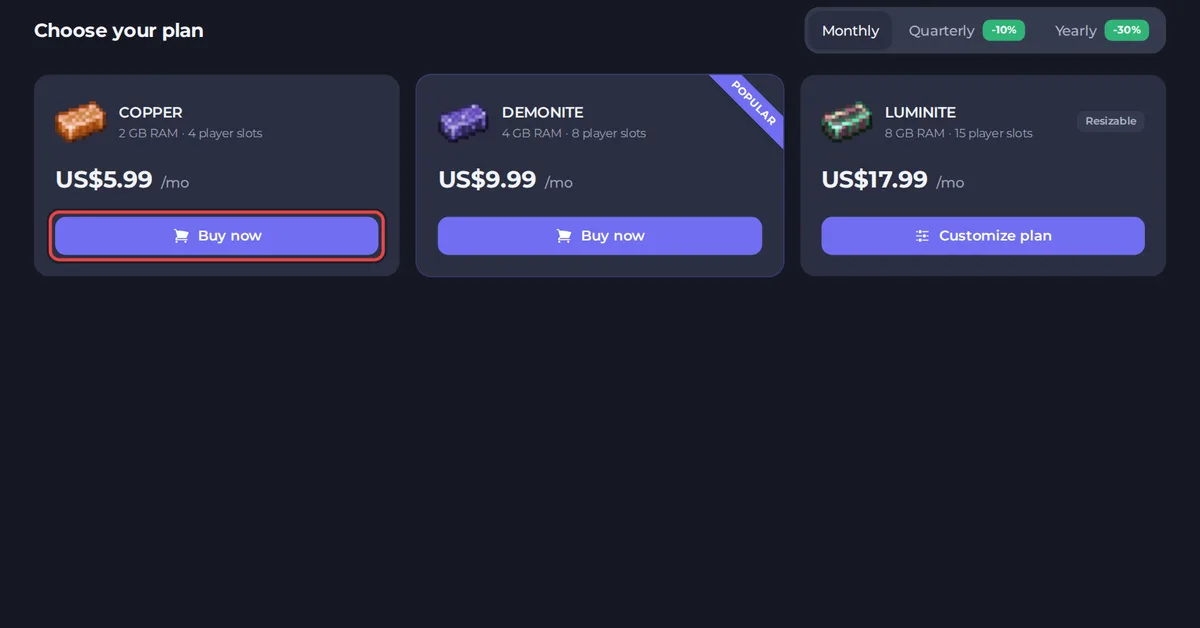
- Choose your plan. Plans are named and sized by memory and player slots, so compare those two numbers against how many people will play. Switch between Monthly, Quarterly and Yearly to see what each billing cycle costs, then click Buy now on your plan. Some plans show Customize plan instead, which lets you resize them.
- Choose location and extras. The next screens take you through the choices one at a time. For example, you will usually see the ones below. Press Next on each to keep the included option.
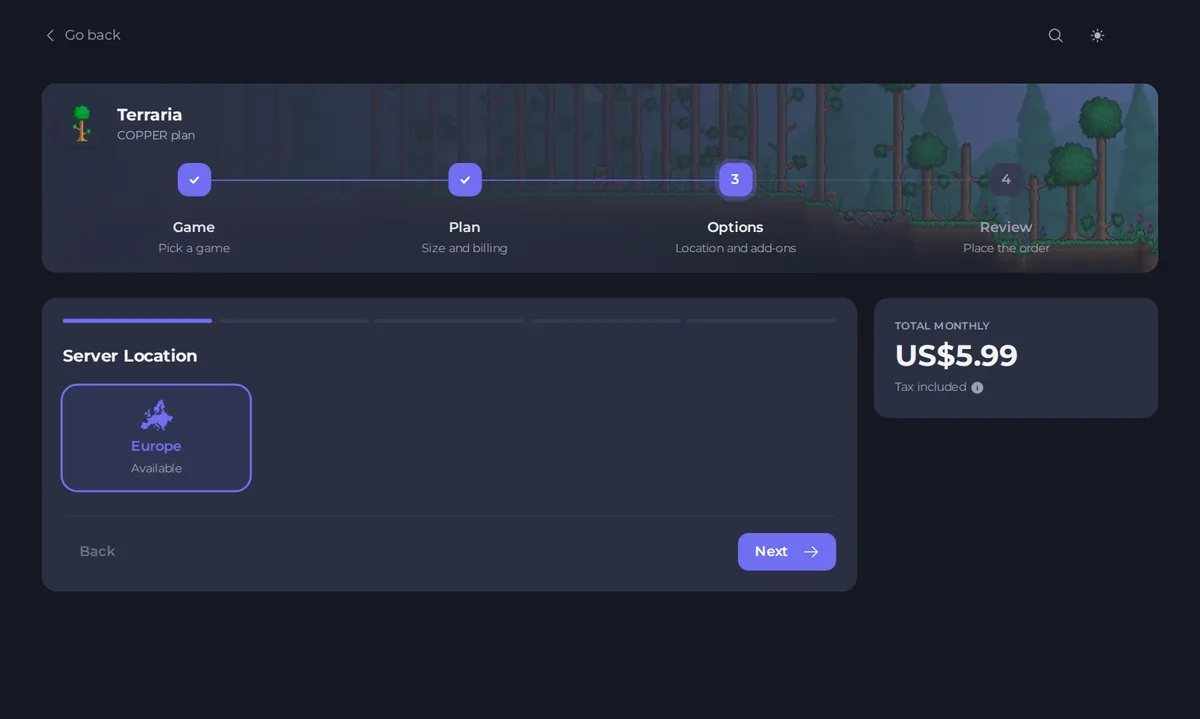
- Server Location: where the server runs. It is shown as Europe in the order flow, and the server runs in Germany. This is the one choice you cannot change later without moving the server. See Where your server runs and how location works.
- CPU: Normal is included, higher tiers cost extra.
- Dedicated IP: where offered, an address only your server uses, so players join without typing a port. If the step only shows No for your plan, you can ask about adding one later. See How to find your server's ports and IP address, and add a dedicated IP.
- Backup Tier: more backup space than the free tier.
- Instance Tier: room for more worlds or setups than the two that are included.
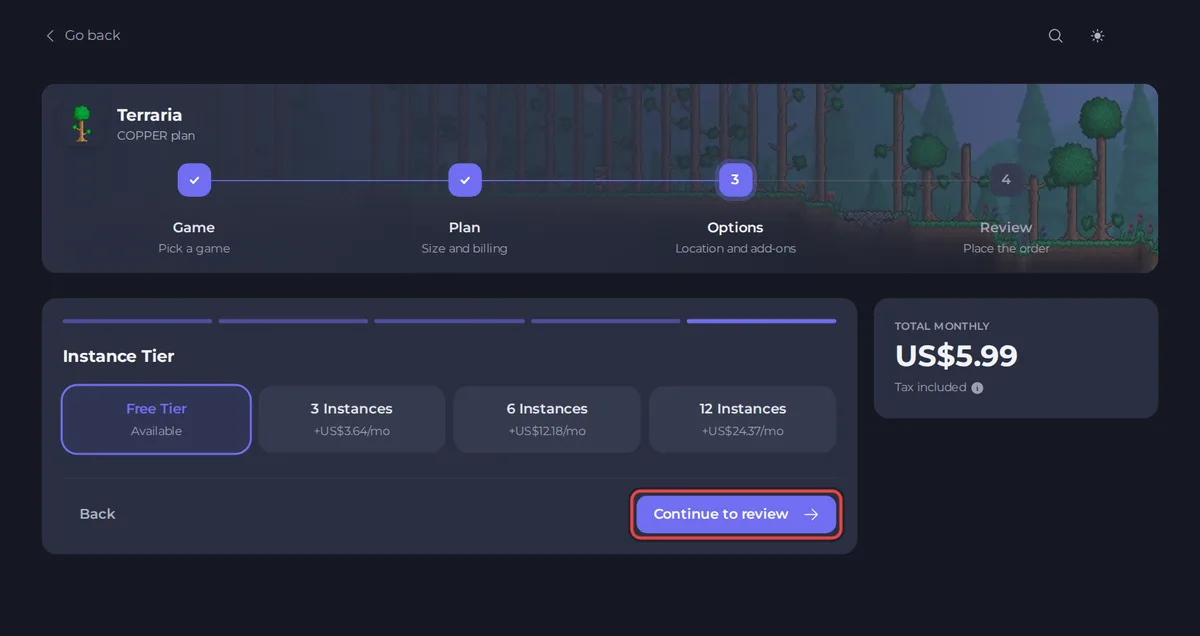
- Review your order. Check the game, plan, billing cycle and total. Under How you will pay, choose your account balance, a saved card, or A different card or wallet. If you have a promo code, click Have a promo code? and enter it before you pay.
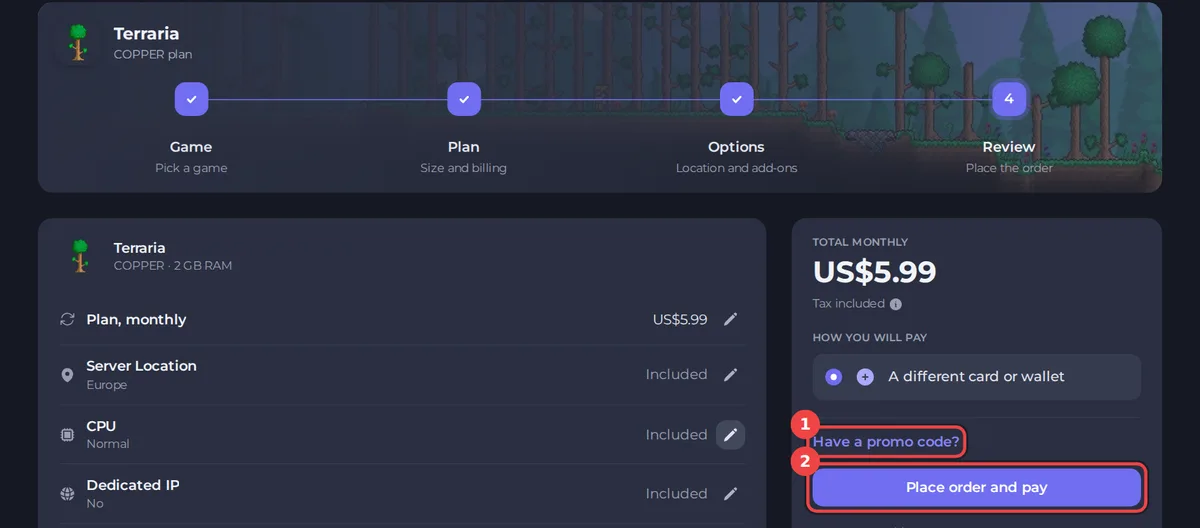
- Click Place order and pay and complete the payment. See How to pay for your order and what happens next.
Good to know
- You can change your plan, billing cycle and extras later. See How to change your plan or billing cycle.
- New orders have a 72-hour money-back guarantee, if you ask within 72 hours. See How refunds work.