

A Rust bot is built on your own computer and uploaded as one finished Linux program; nothing is compiled on the server, so all of your plan's memory goes to the bot. To run one:
- Build it for Linux x86-64 on your computer.
- Switch the type: on the Bot page, pane Code, click Change what runs next to Runtime and pick Rust Bot.
- Upload the program (named
botby default) in Files, or set Download link (optional) on the Code pane. - Paste your token on the Bot page, pane Discord, and click Connect.
- Press Start and watch Console.
1. Build for Linux
rustup target add x86_64-unknown-linux-musl
cargo build --release --target x86_64-unknown-linux-musl
The program lands in target/x86_64-unknown-linux-musl/release/, named after your crate. The musl target makes one self-contained file that does not depend on the server's system libraries. Building on Windows or macOS needs a Linux linker; tools such as cross or cargo-zigbuild handle that for you. A .exe or a macOS build does not run on the server.
2. A minimal serenity bot
Cargo.toml (dependencies)
[dependencies]
serenity = "0.12"
tokio = { version = "1", features = ["macros", "rt-multi-thread"] }
src/main.rs
use serenity::async_trait;
use serenity::model::gateway::Ready;
use serenity::prelude::*;

struct Handler;

#[async_trait]
impl EventHandler for Handler {
    async fn ready(&self, _ctx: Context, ready: Ready) {
        println!("Logged in as {}", ready.user.name);
    }
}

#[tokio::main]
async fn main() {
    let token = std::env::var("DISCORD_TOKEN").expect("DISCORD_TOKEN is not set");
    let mut client = Client::builder(&token, GatewayIntents::GUILDS)
        .event_handler(Handler)
        .await
        .expect("could not create the client");

    if let Err(why) = client.start().await {
        println!("Client error: {why:?}");
    }
}
The token comes from DISCORD_TOKEN. Printing Logged in as turns the chip on Overview to Online in Discord. poise and twilight bots work the same way: build, upload, start.
3. Switch the type to Rust Bot
On the Bot page, pane Code, click Change what runs next to Runtime and pick Rust Bot. On a computer, the type label at the top of the page (for example Node.js Bot) opens the same dialog. See How to switch your bot to another language.
4. Put the program on the server
Upload it: rename your program to bot (or set Entry file to its name), then in Files click Upload and pick it. Upload any files it reads next to it. The server makes it executable at start.
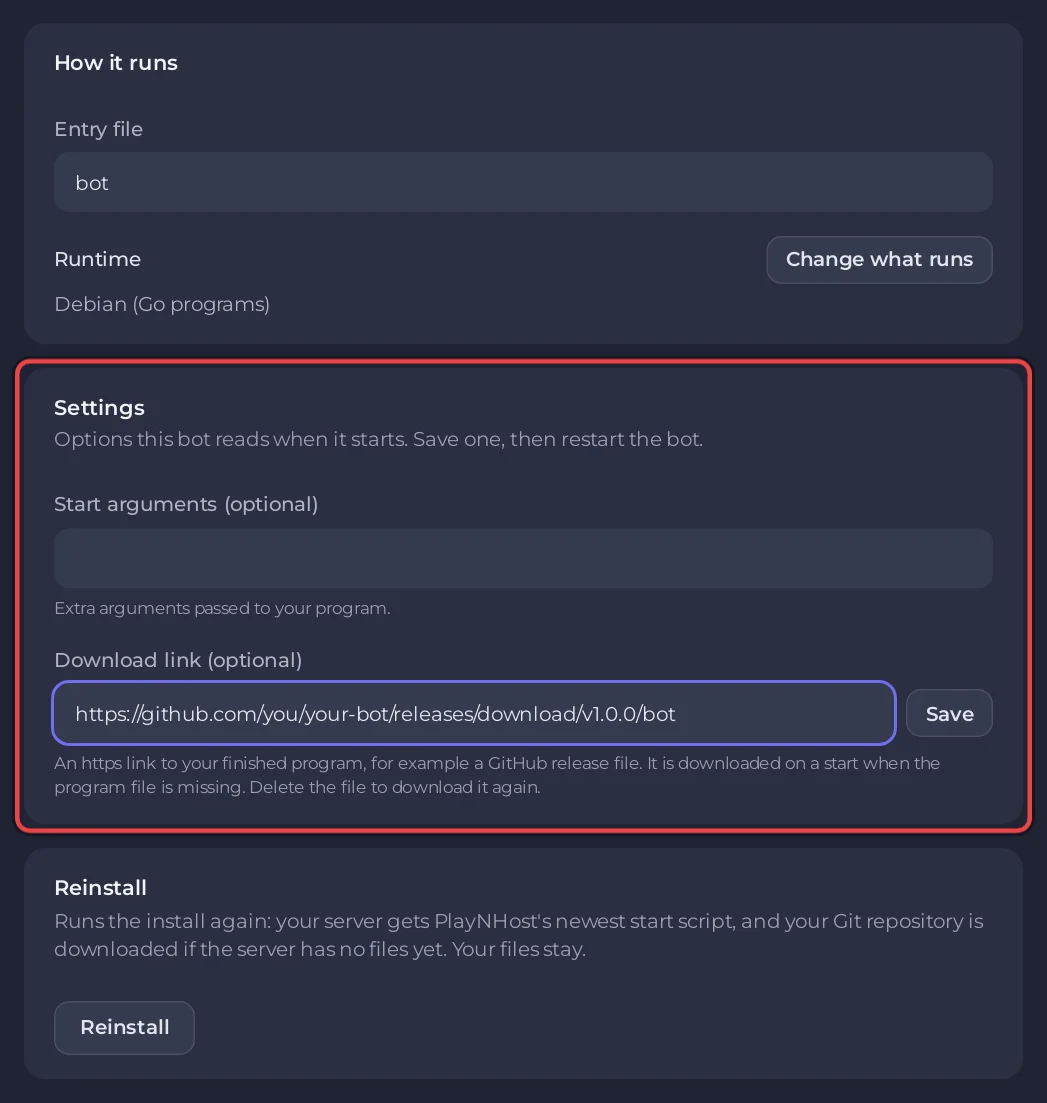
Or let the server download it: on the Bot page, pane Code, card Settings, set Download link (optional) to an https link to your finished program, for example a GitHub release file, and click Save. On a start, when the program file is missing, the server downloads it (up to 500 MB). To update, publish a new build at that link, delete the program in Files, and press Start. With a link set, Start bot in the setup card works before the file exists: the download runs as part of the start.
5. Check the settings and start
- Entry file (card How it runs): the program's name and folder,
botby default. - Start arguments (optional) (card Settings): extra arguments for your program. Shell characters like
$,;,&and>are not allowed.
Paste your token on the Discord pane, click Connect, then press Start. The console shows [PlayNHost] Starting your bot and then your program's output.
Console lines you may see
| Line | What to do |
|---|---|
[PlayNHost] Your bot is not set up yet: the program bot was not found. | Upload the program, or set Entry file to its exact name and folder. |
[PlayNHost] bot is not a Linux program. Build it for Linux x86-64 (not Windows or macOS) and upload it again. | Build again for x86_64-unknown-linux-musl. |
[PlayNHost] Downloading your program, then [PlayNHost] The download failed. Check the download link on the Bot page, Code, Settings, then press Start. | The link is wrong, private, or not https. Check Download link (optional) on the Code pane, under Settings. |
DISCORD_TOKEN is not set (from the example) | Paste the token on the Discord pane, then restart. |
Rust bots have no Git source and no Packages field: your crates are inside the program. Keys and passwords go under Environment, read with std::env::var: How to set environment variables and secrets.


